Lego Table
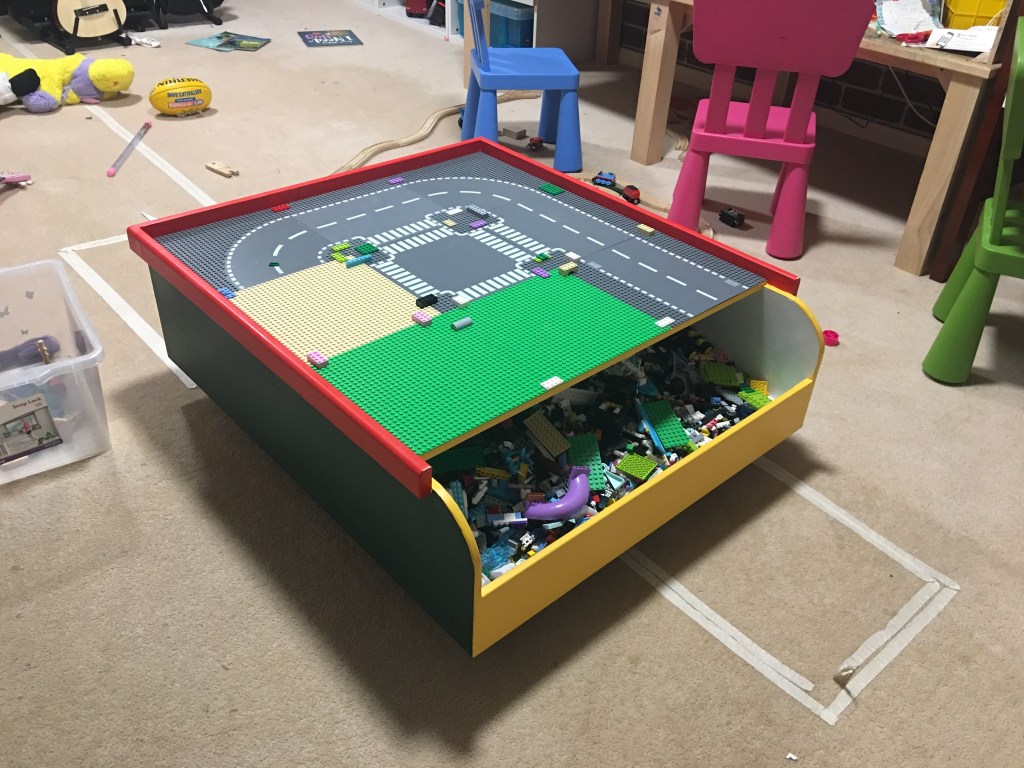
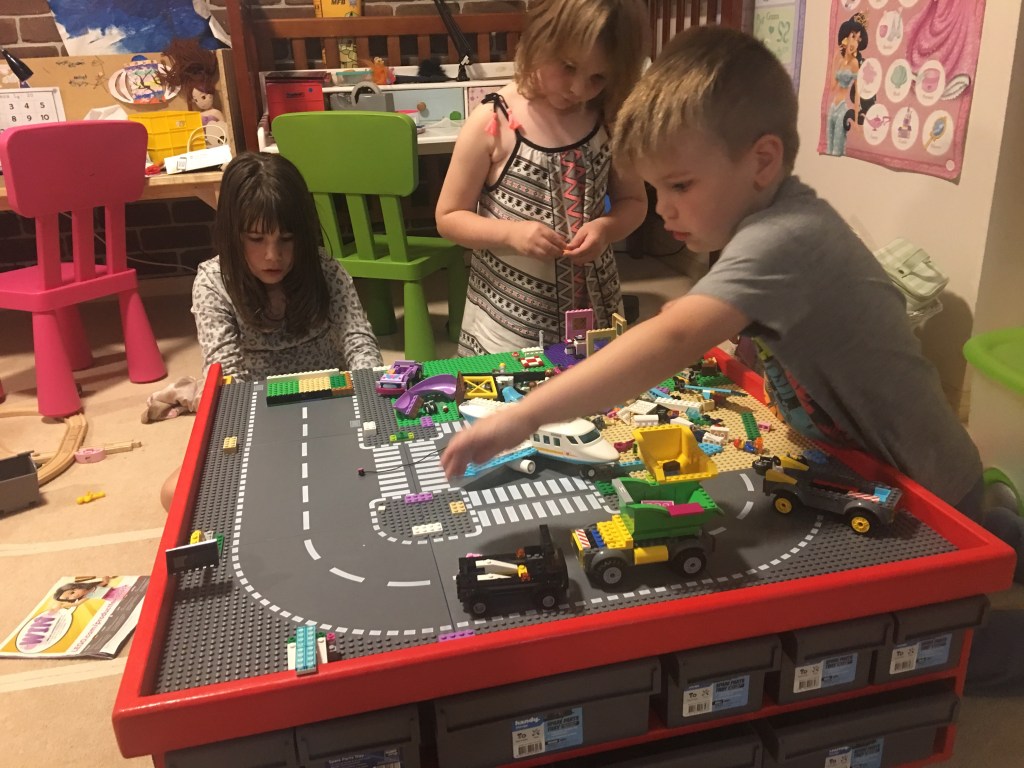
I built this Lego table for the kids after stepping on Lego on the floor one to many times! On one side it has a set of drawers with dividers that I bought cheap at Bunnings, and on the other side it has a large bin where they kids can quickly scoop their Lego away, or can put larger models they don’t want to break up.
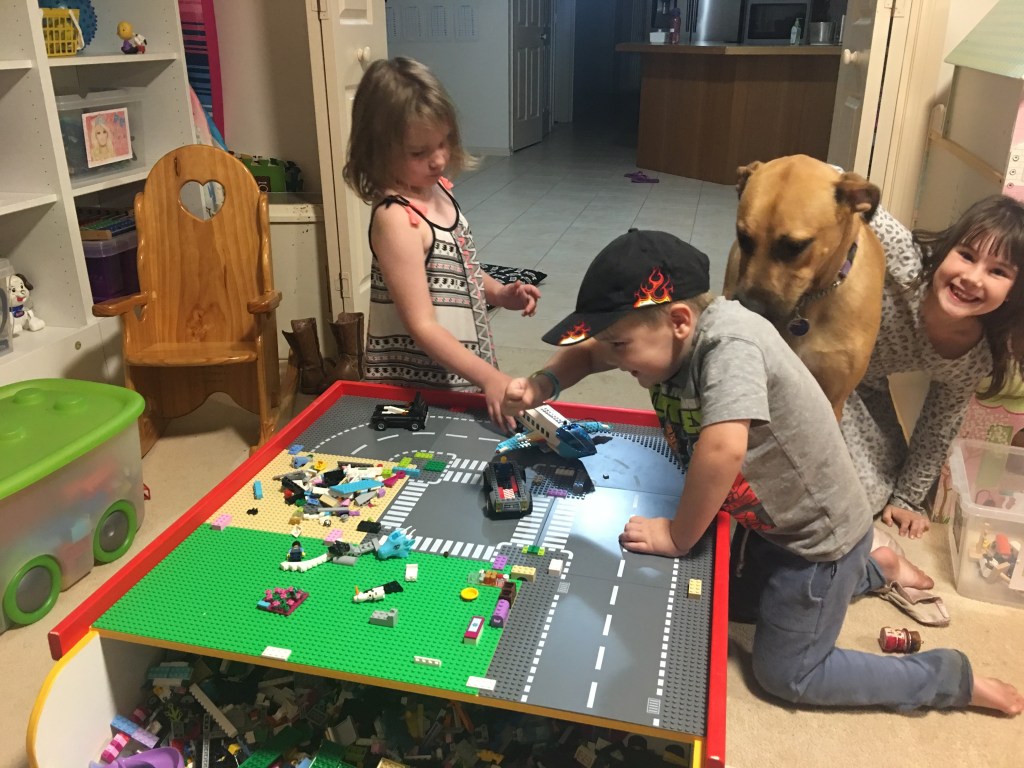
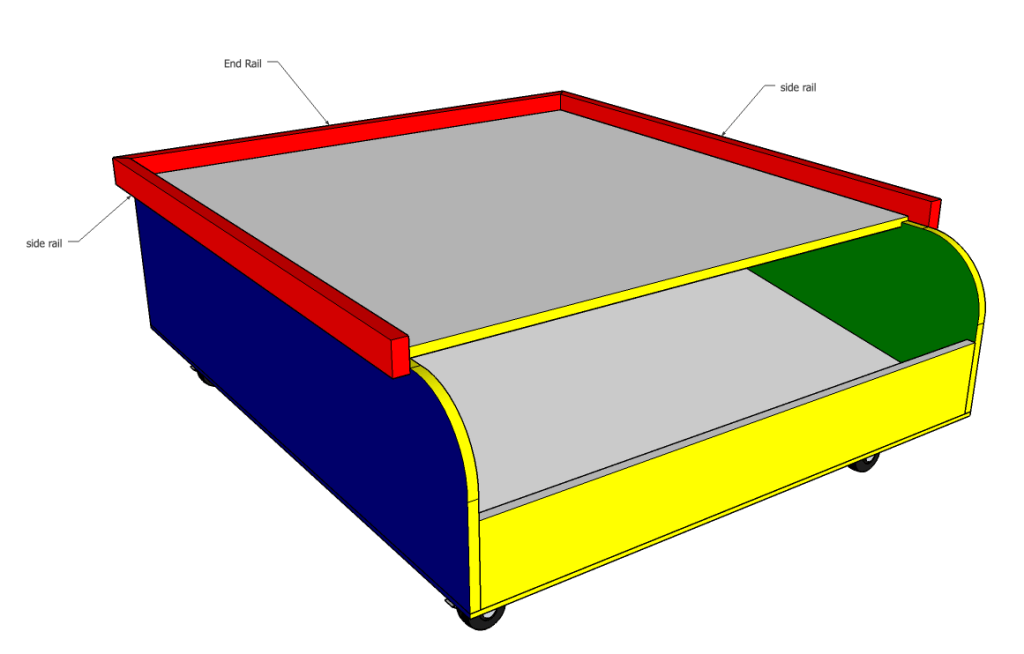
There’s a rail around the top edge on three sides (not on the bin side) to stop pieces accidentally falling off.
The top is 9 Lego plates — they’re lightly stuck down with spray adhesive so they can be rearranged or replaced.
Components
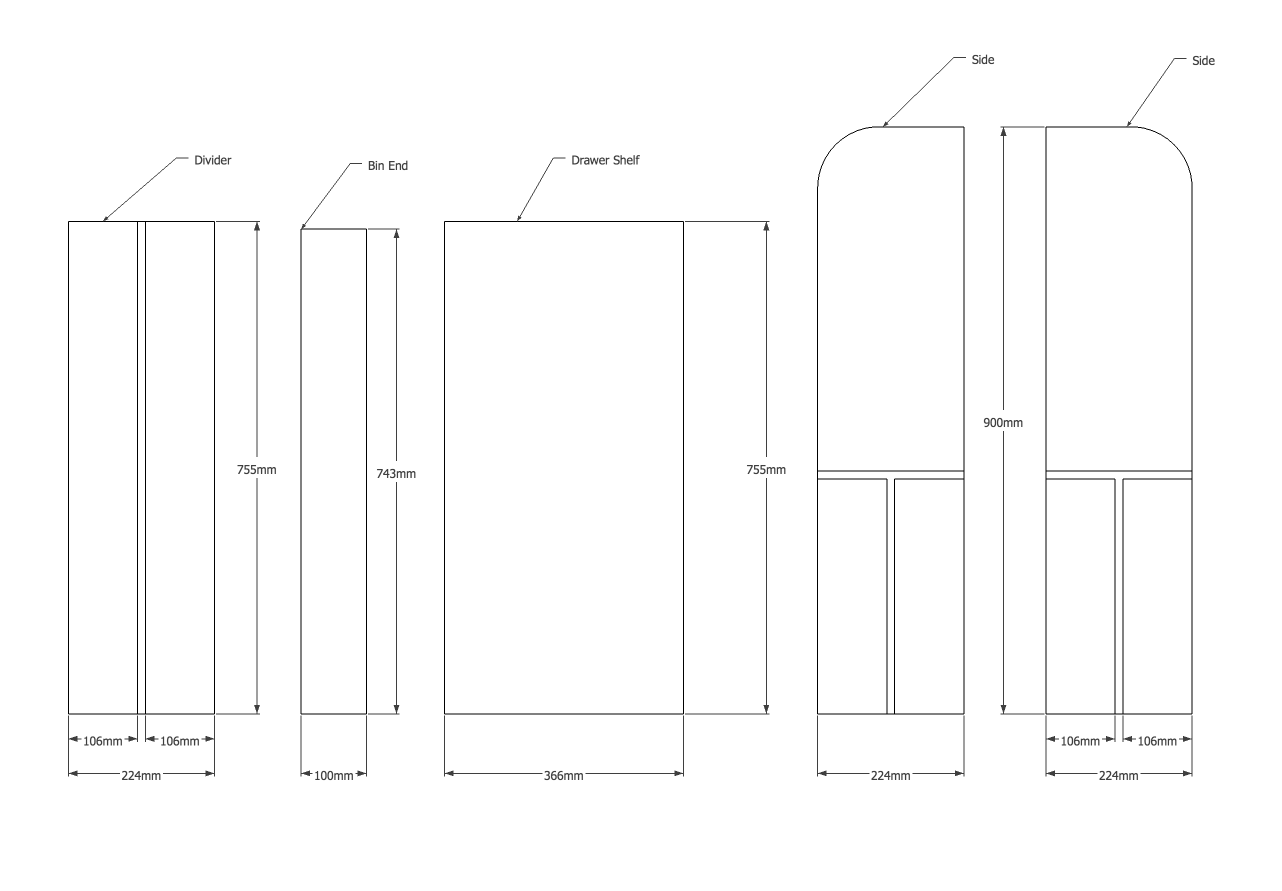
I made the table out of sheets of 12mm MDF — for a project like this it’s easy to work with and strong. At most joints I cut a 6mm trench/rebate so that the glue up would snap together easily. I didn’t use any nails or screws to hold the main part of the table together — just glue and clamps — which is possible because of the trenches & rebates. (Trenches and rebates shown in the component list below.)
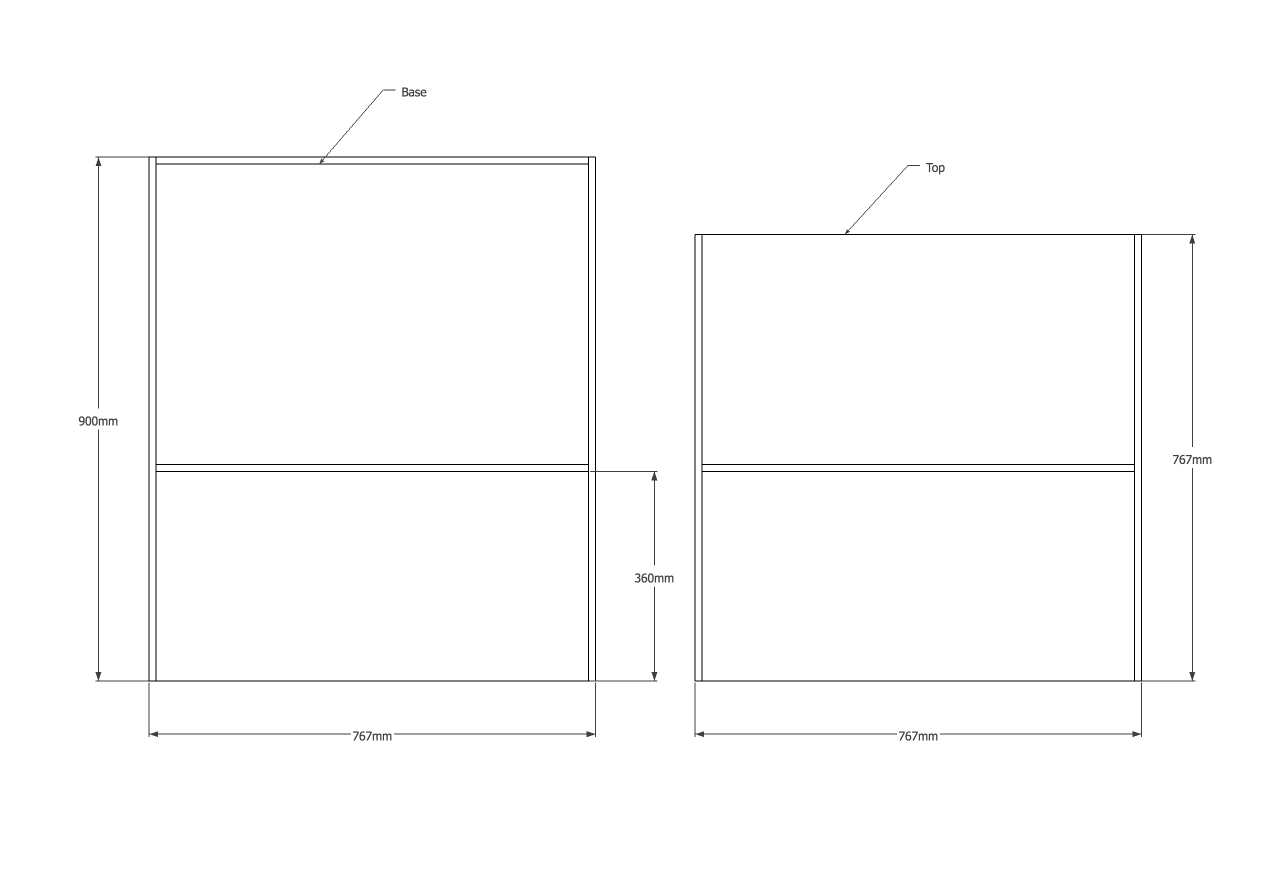
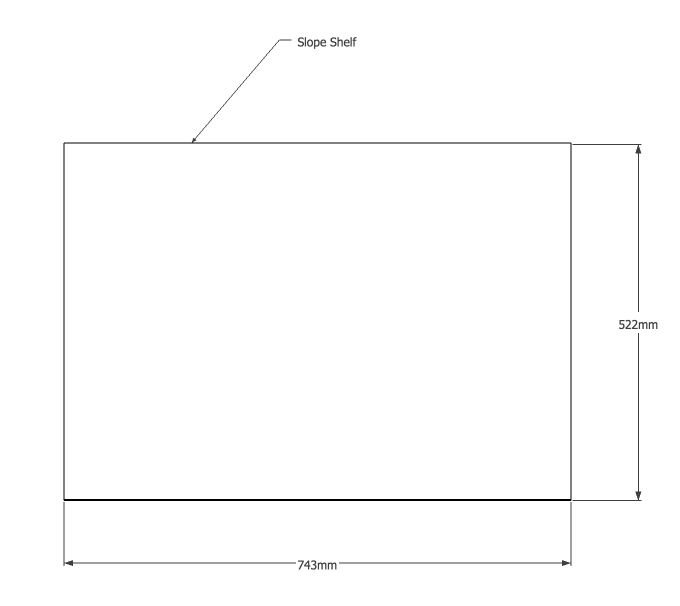
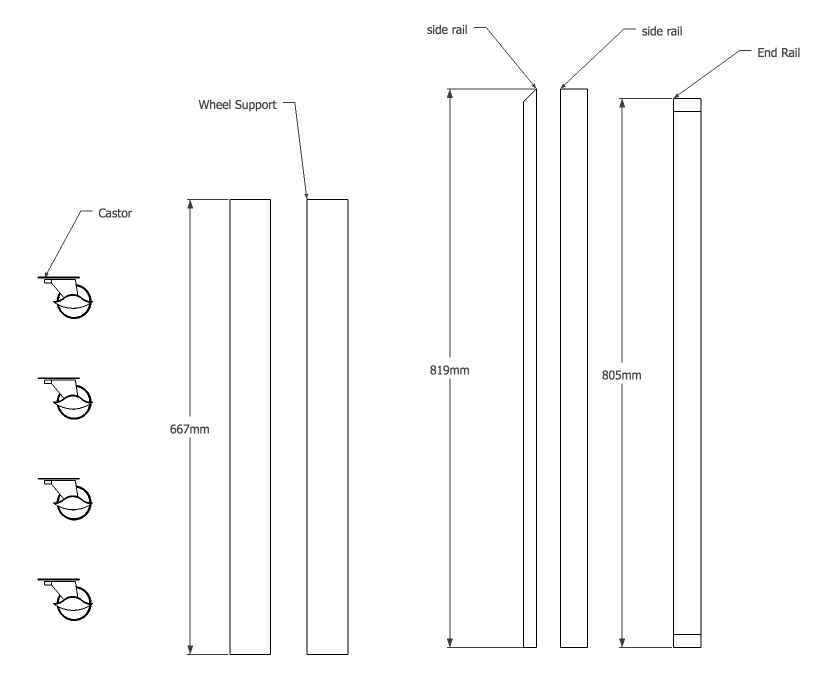
The images below show the dimensions I used — there are a few critical dimensions that you can change based on what you’re building:
- 767mm is the width of 3 Lego plates side-by-side (the finished table has a 3×3 grid of plates, so 767mm in two dimensions. Note that the plates can’t be butted up tight against each other, otherwise the blocks can’t be placed across them — there needs to be a small gap. If you’re fastening (e.g.: gluing) the plates to the table, then you should connect them with lego before attaching them so that you get the right distance between the plates.
- 360mm is the depth of the plastic drawers I bought to go on the drawer side
- 100mm is the height of the drawers.
- The railing around the top edge (to stop pieces falling off ) is 40x19mm DAR pine, and the wheel supports on the bottom are 60×19 DAR pine. The wheel supports are there to provide enough depth for the screws attaching the castors without the screws going through into the drawers.
Assembly
This cutaway view shows the overview of how it’s assembled — drawers on one side, and a big bin on the other with a sloping bottom. The sloping bottom is there so that the Lego in the big bin slides to the front where it’s easier to reach.

Step 1
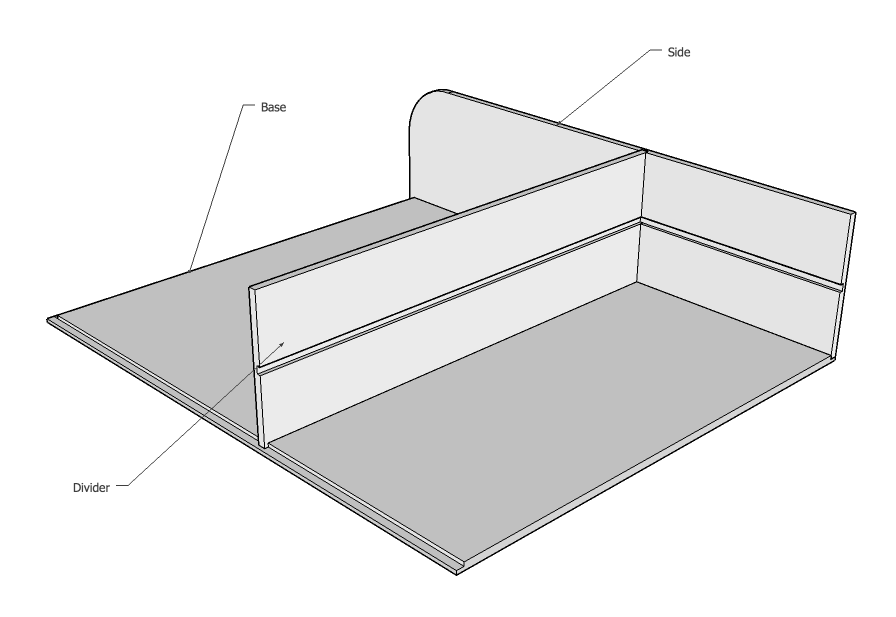
Glue and clamp one side and the middle divider to the base.
Step 2
Glue and clamp the other side and the front edge of the bin.
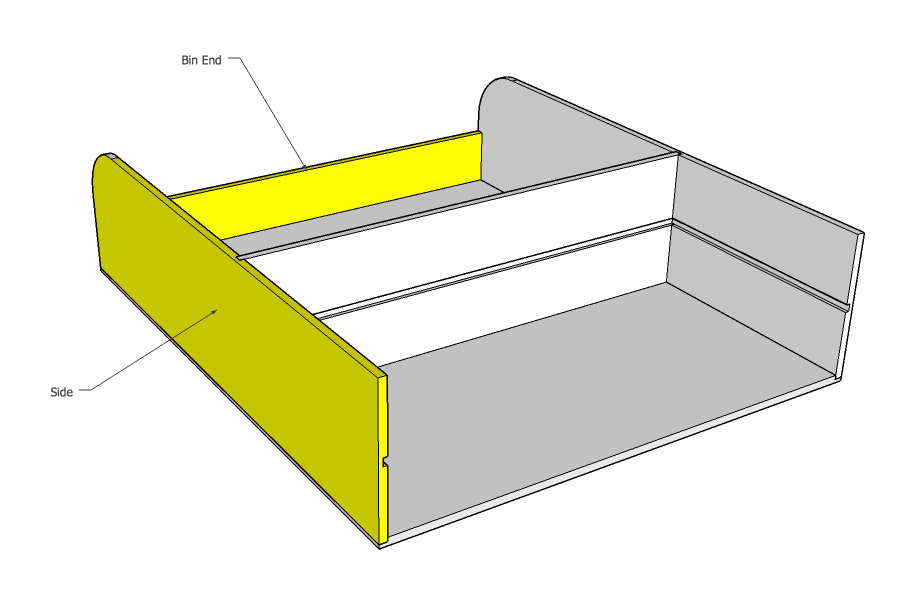
Step 3
Glue and insert the drawer shelf, and the sloping bin shelf. The width of the sloping shelf depends upon what angle you want it to slope, and you should cut the edges at the same angle (I did it using a tilted blade on my table saw, but you could do it with a jig saw or circular saw). Cut it a bit wide and then get a good fit. I didn’t end up gluing the sloping shelf in place — it was a snug fit and didn’t need any glue.
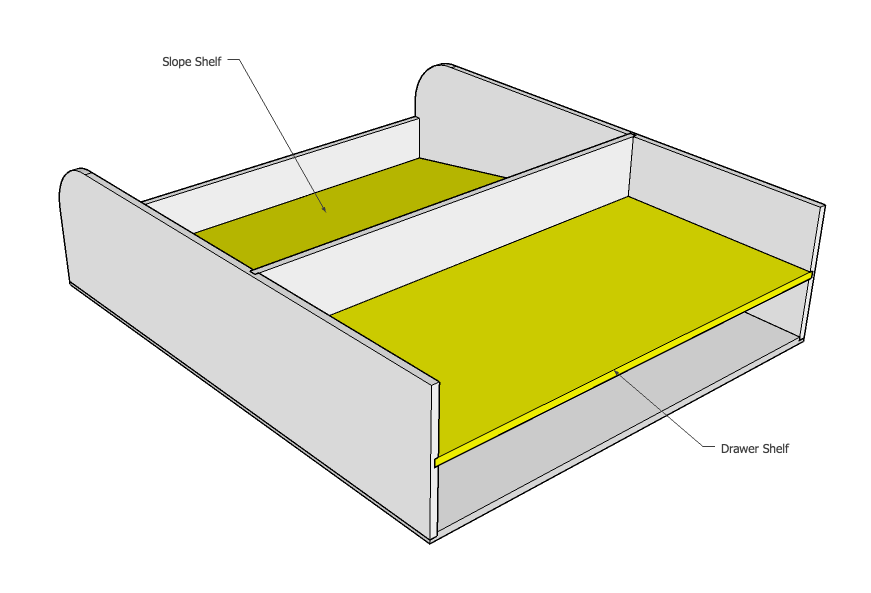
Step 4
Glue and clamp the top.
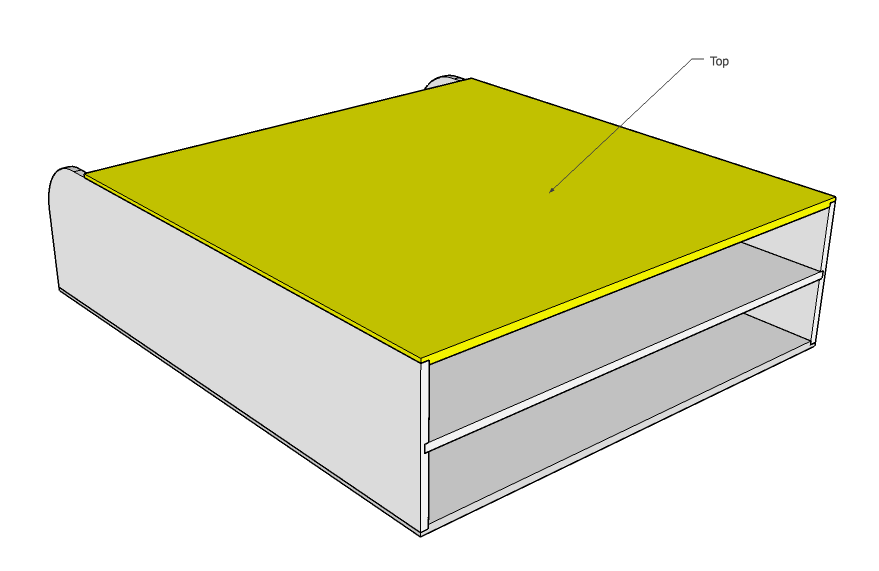
Step 5
Screw the wheel supports to the base, and attach the castors to the wheel supports. Make sure any screws you use aren’t too long so that they don’t poke through into the drawers.
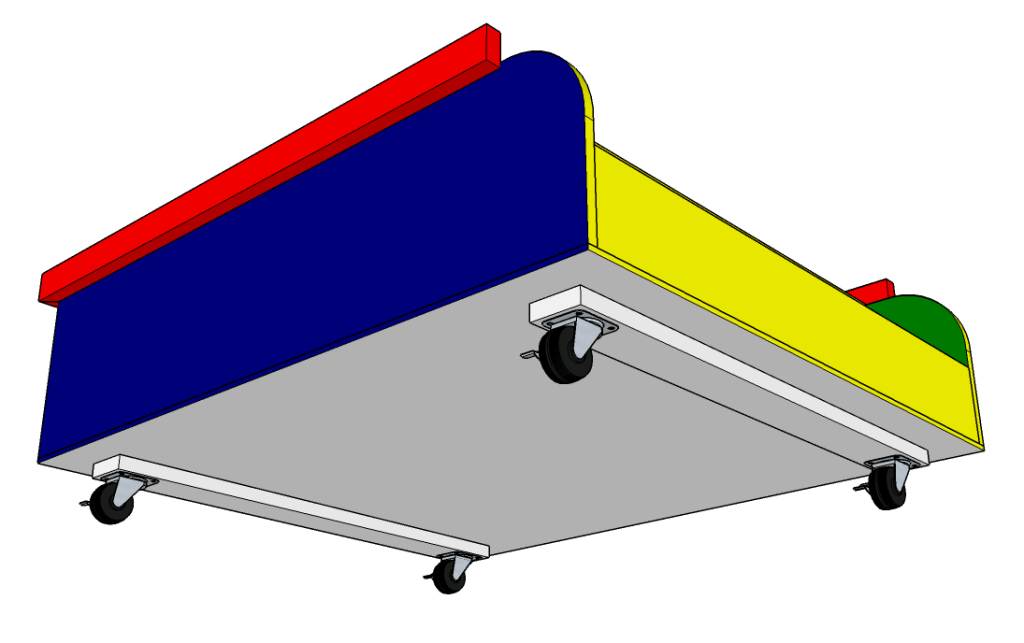
Step 6
Glue and clamp the side and end rails around the top edge. I added some nails to hold the rails firmly in place. After attaching the rails I went around all of the edges with a roundover bit on my router to make sure there are no sharp corners.
Step 7
Sand everything smooth (I went up to 240 grit) and then paint it how you wish. I spent a bit of time painting different parts in red, blue, yellow and green. Note that MDF can’t be painted directly with a water-based paint: I used an oil-based white undercoat, and on top of that I could then apply the water-based coloured top coats.
Lastly I put the drawers in and used some spray adhesive to stick some Lego plates to the top . All done!
